
Barbell rows for upper back development are the most effective horizontal pulling exercises you can do with a single piece of equipment. They target your lats, trapezius, rhomboids, and rear deltoids simultaneously, building the thickness and width that defines a powerful physique. Whether you are new to lifting or training for years, mastering barbell rows transforms your upper back faster than any machine or cable exercise can. This guide covers the 7 best barbell rows for upper back strength, with exact step-by-step form instructions, muscles worked, grip variations, and the most common mistakes that keep people stuck at position #92 instead of the top of their game.
Muscles Worked by Barbell Rows for Upper Back
Latissimus Dorsi (Lats): The largest muscle in your upper body. Barbell rows pull the upper arm toward the torso, which is the primary function of the lats. Wide rows with a more horizontal torso angle create the greatest lat stretch and contraction.
Trapezius (Traps): The large diamond-shaped muscle covering your upper and mid-back. Your traps retract and elevate the shoulder blades at the top of each row. A wider overhand grip places more emphasis on the upper traps.
Rhomboids: Sit between your shoulder blades and pull them together. Barbell rows are one of the best exercises for rhomboid development, improving posture and preventing rounded shoulders.
Rear Deltoids: The back portion of your shoulder. They assist in shoulder extension during the top of the rowing movement, especially when elbows flare slightly outward.
Erector Spinae: Run along both sides of your spine and work isometrically during rows to keep your torso rigid in the hinge position. Biceps Brachii: Work as secondary movers to bend the elbow and help pull the bar toward the body.
Why Barbell Rows for Upper Back Are the Most Effective Back Builder

Your back is made up of several major muscle groups that work together to create strength and stability. The latissimus dorsi, commonly called the lats, are the large muscles that create that wide, powerful look. Your trapezius muscles run from your neck down to your middle back, while the rhomboids sit between your shoulder blades. All these muscles need proper training to develop fully.
Using a barbell for your back exercises offers several unique advantages over other equipment. First, barbells allow you to lift heavier weights than dumbbells or cables, which means you can create more mechanical stress on your muscles. This increased stress is exactly what triggers muscle growth and strength gains. Second, barbell movements often require your core and stabilizer muscles to work hard, giving you more overall development from each exercise.
Another reason why back exercises with barbell movements are so effective is that they teach your body to work as a single unit. When you perform a heavy barbell row, your legs, core, and back all have to coordinate perfectly. This kind of full-body integration builds functional strength that carries over into everyday life and other sports.
7 Best Barbell Rows for Upper Back: Step-by-Step Instructions
When planning your training routine, you need to focus on movements that target all areas of your back. Different exercises emphasize different muscles, so including variety in your program ensures balanced development. Let me share the most effective movements that should form the foundation of your back training.
Bent-Over Barbell Row — The Foundation of Upper Back Training
The bent-over barbell row is the most studied and most effective barbell exercise for upper back development. It works your lats, traps, rhomboids, rear delts, biceps, and core simultaneously, and allows you to progressively add weight over months and years.
How to do it:
Step 1. Stand with feet hip-width apart, toes pointing slightly out, with the barbell over your mid-foot. Step
2. Hinge at your hips and bend your knees slightly until your torso is between 45 degrees and parallel to the floor. Grip the bar with an overhand grip, just outside shoulder-width.
Step 3. Brace your core hard. Keep your back flat and chest up. This is your starting position.
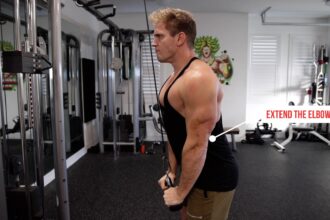
Step 4. Drive both elbows straight back toward the ceiling. Pull the bar toward your lower chest or upper stomach. Do not let your torso rise.
Step 5. At the top, squeeze your shoulder blades together and hold for one second.
Step 6. Lower the bar with control back to the starting position. Do not drop it or let momentum take over. Muscles worked: Lats (primary), trapezius, rhomboids, rear deltoids, biceps, erector spinae Pro tip: Think “elbows to the ceiling” rather than “pull the bar up.” This cue shifts activation from your biceps to your upper back muscles.
Yates Row — The Upper Back Row for Maximum Trap Thickness
The Yates Row was developed and popularized by six-time Mr. Olympia Dorian Yates, who used it as his primary back exercise. The more upright torso angle — around 70 degrees from the floor — shifts emphasis from the lats to the upper traps, rhomboids, and rear deltoids, making it the best barbell row variation for upper back thickness. How to do it: Step 1. Stand holding the barbell with an underhand grip (palms facing up), hands just outside hip width. Step 2. Hinge at your hips until your torso is at roughly a 70-degree angle — more upright than a standard bent-over row. Step 3. Brace your core and keep your lower back neutral. Step 4. Pull the bar toward your lower chest, driving your elbows back and close to your sides. Step 5. Squeeze your shoulder blades hard at the top. Step 6. Lower the bar with full control back to the start. Muscles worked: Upper trapezius (primary), rhomboids, lats, rear deltoids, biceps Pro tip: Because the underhand grip naturally tucks the elbows, this variation feels easier on the shoulder joint and lets many lifters handle heavier weights than a standard overhand row.
The pendlay row stands out as one of the most powerful barbell lat exercises you can perform. Named after Olympic weightlifting coach Glenn Pendlay, this explosive rowing variation focuses on generating maximum power with each repetition. Unlike traditional bent-over rows where you keep tension throughout the movement, pendlay rows start from a dead stop on the floor each time. You hinge forward until your torso is nearly parallel to the ground, grip the bar wide, and explosively pull it toward your hips. The explosive nature of this movement allows you to handle more weight than usual, creating greater mechanical stress for muscle growth.
What makes the pendlay row special is that it eliminates any momentum or cheating from the exercise. Each rep starts fresh, forcing your back muscles to do all the work. You should focus on pulling powerfully and quickly, but you do not need to control the weight slowly on the way down. Simply let it return to the floor and reset for the next rep.
The t-bar row is another excellent choice for building serious back thickness. This movement allows you to lift even heavier weights than standard barbell rows because the setup provides better leverage and stability. You can create a t-bar setup using a landmine attachment, or simply wedge one end of a barbell into a corner and load plates on the other end. Straddle the bar, hinge at your hips, and use handles or straps wrapped under the bar to create grips.
The t-bar row places less stress on your lower back compared to bent-over rows, making it perfect if you experience any back discomfort with other rowing movements. The neutral grip position also feels more natural for many people and allows for a great contraction at the top of each repetition. Focus on drawing your elbows up and back while keeping them close to your body, then squeeze your shoulder blades together at the top.
For those looking to address muscle imbalances and build rotational core strength, the meadows row is an outstanding choice. This single-arm variation was popularized by the late bodybuilder John Meadows. You stand at the end of a loaded barbell and grip the thick end with one hand using an overhand grip. The unique angle of pull works your lats from a different direction than traditional rows, and the offset loading forces your core to work hard to prevent rotation.
The meadows row also provides an excellent grip workout since you are holding the thick end of the barbell. This increased grip challenge translates to better performance in all your pulling exercises. Remember to keep your back flat and hips behind your heels as you row the weight toward your hip.
Close grip rows offer a simple but effective variation on the standard bent-over row. By bringing your hands closer together, roughly shoulder-width apart, you shift more emphasis onto your lats and less onto your upper back. This makes close grip rows perfect for building that coveted width in your back. The narrower grip also allows for a greater range of motion, which can lead to better muscle activation.
When performing close grip rows, focus on creating an arc-like motion as you pull the bar toward your hips. Pause at the top and really squeeze your shoulder blades together while keeping your shoulders away from your ears. The controlled negative portion of each rep is just as important as the explosive pull, so lower the weight with control.
The chest-supported barbell row removes lower back fatigue from the equation by supporting your torso throughout the movement. You set up an incline bench at about 45 degrees or prop a flat bench up on boxes, then lie face-down with a loaded barbell positioned underneath. This setup isolates your upper back muscles beautifully and allows you to focus entirely on the pulling motion without worrying about maintaining your hip hinge position.
Chest-supported rows are particularly valuable toward the end of workouts when your lower back is already tired from earlier exercises. They also work well for people recovering from lower back injuries who still want to train their upper back effectively. The supported position eliminates momentum completely, ensuring every rep provides quality muscle stimulation.
Grip Variations for Barbell Rows: How Grip Changes Which Upper Back Muscles You Hit
Overhand grip (pronated): Palms face down. Emphasizes the upper traps, rhomboids, and rear deltoids. Best for upper back thickness. Pull the bar toward your lower chest or upper stomach.
Underhand grip (supinated): Palms face up. Shifts emphasis toward the lats and biceps. Allows elbows to stay closer to the body, increasing lat activation. This variation is called the Yates Row, made famous by Dorian Yates.
Narrow grip (hands inside shoulder width): Targets the center of the lats and allows a greater range of motion at the top of the row.
Wide grip (hands outside shoulder width): Targets the outer lats and upper traps more. Bar path travels higher toward the chest rather than the stomach.
Creating Your Barbell Back Workout Routine

Building an effective barbell back workout requires more than just picking random exercises and doing a few sets. You need a structured approach that addresses all aspects of back development while allowing for proper recovery. The workout structure matters just as much as the exercises themselves.
Start your back training sessions with a heavy compound movement that allows you to move the most weight. Begin your session with a heavy compound row as your primary movement. Build up to a challenging set of 3 to 5 reps to activate your nervous system before moving into your higher-volume work.
After your warm-up sets, consider building up to a heavy set of three to five reps on a primary rowing movement. This heavy work fires up your nervous system and makes the lighter weights feel easier during the rest of your workout. Give yourself adequate rest between heavy sets, typically three to five minutes, to ensure you can perform at your best.
Following your heavy work, move into your main training volume. This is where you accumulate the majority of your muscle-building sets. Choose two or three different rowing variations and perform three to four sets of six to twelve repetitions on each exercise. This rep range provides an excellent balance between strength development and muscle growth.
A clean, concrete sample weekly workout using the 7 exercises from this article, formatted as two training days (Day A and Day B) with sets, reps, and rest periods clearly specified. This directly answers the programming question searchers have after reading an exercise guide.
A short paragraph recommending a finisher approach with a concrete rest-pause or double-progression method tied to the exercises already covered in the article, keeping the content internally consistent and practically actionable. This type of training creates a tremendous pump and leaves you feeling fully worked.
5 Most Common Barbell Row Mistakes That Kill Upper Back Gains
Mistake 1. Using too much weight and turning the row into a deadlift shrug. When the weight is too heavy, the torso rises above 15 degrees from horizontal and the lower back and hips take over. Your upper back stops working. Fix: Lower the weight until you can keep your chest pointing at the floor throughout the entire set.
Mistake 2. Pulling to the wrong spot. Rowing the bar toward your chin works your upper traps, not your lats. Rowing toward your belly button shifts emphasis to the lats. For full upper back development, pull the bar to your lower chest or upper stomach.
Mistake 3. Not retracting your shoulder blades. If you pull only with your arms, your rhomboids and traps do not work through their full range. Initiate each rep by driving your elbows back and squeezing your shoulder blades together at the top. Hold that contraction for one second.
Mistake 4. Rounding the lower back. A rounded lumbar spine during heavy rows compresses spinal discs and shifts load away from your back muscles. Always set a neutral spine before unracking the bar and brace your core as if bracing for a punch.
Mistake 5. Using momentum to bounce every rep. Jerking the bar off the floor with hip drive reduces upper back muscle activation. Use controlled, strict reps, especially on the way down. The lowering portion activates muscles just as much as the pull.
Tips for Maximum Results
Getting the most from your back training goes beyond just showing up and lifting weights. Small details in your technique and programming can make a huge difference in your results over time. Pay attention to these key principles to accelerate your progress.
Always prioritize proper form over lifting heavy weights. Your ego might want to pile on more plates, but sloppy technique will only lead to poor results and potential injury. Focus on feeling the target muscles work during each repetition. If you cannot maintain good form, reduce the weight until you can perform the movement correctly.
Mind-muscle connection plays a crucial role in back training. Many people struggle to feel their back muscles working because they rely too much on their arms during pulling movements. Before you start pulling, think about driving your elbows back rather than pulling with your hands. Imagine your hands are simply hooks connecting you to the weight. This mental cue helps ensure your back muscles do the work.
Progressive overload remains the foundation of all strength and muscle gains. You need to gradually increase the demands placed on your muscles over time. This does not always mean adding more weight to the bar. You can also progress by performing more reps with the same weight, adding an extra set, or improving your exercise technique.
Recovery deserves just as much attention as your training itself. Your muscles grow during rest periods, not while you are lifting. Make sure you are getting enough quality sleep each night, typically seven to nine hours for most people. Proper nutrition also plays a vital role in recovery and muscle growth. Focus on eating enough protein, generally around one gram per pound of body weight for active individuals.
For more comprehensive guidance on building muscle and improving your overall fitness, check out the expert resources available at mensbuddy.com. The site offers detailed training programs and nutrition advice specifically designed to help men achieve their fitness goals.
Frequently Asked Questions About Barbell Rows for Upper Back
Q1: Are barbell rows good for upper back development?
A: Yes. Barbell rows are the most effective exercise for building upper back thickness and width. They target the lats, trapezius, and rhomboids through a full range of motion under heavy load — a combination no machine or cable exercise can fully replicate.
Q2: What is the best torso angle for barbell rows to hit the upper back?
A: A torso angle between 45 degrees and parallel to the floor maximizes upper back activation. A more upright angle — like the Yates Row at 70 degrees — shifts emphasis to the upper traps. As a general rule, the closer your torso is to horizontal, the more your lats work.
Q3: Should I use overhand or underhand grip for upper back barbell rows?
A: Overhand grip emphasizes the upper traps, rhomboids, and rear deltoids. Underhand grip, as used in the Yates Row, shifts emphasis toward the lats and biceps. For maximum upper back development, use both in your training program.
Q4: Why do I feel barbell rows in my lower back instead of my upper back?
A: This usually means the weight is too heavy or your hip hinge position is breaking down. Lower the weight and keep your torso at a consistent angle throughout every rep. Also focus on initiating the movement by driving your elbows back rather than pulling with your hands.
Q5: How many sets of barbell rows should I do per week for upper back growth?
A: Most research and experienced coaches recommend 10 to 20 hard sets per week for upper back development. A practical starting point is 3 to 4 sets of 6 to 12 reps done twice per week, which gives you 6 to 8 weekly sets that you can build from over time.
Start Building Your Best Back Today
Developing a strong, muscular back transforms not just your appearance but your overall quality of life. The exercises covered in this guide provide everything you need to build impressive back muscles that turn heads and improve your functional strength. Remember that consistency matters more than perfection, and every workout brings you one step closer to your goals.
Take the time to learn proper technique for each movement before worrying about how much weight you can lift. Your future self will thank you for building a solid foundation of good form and body awareness. As you progress, continue challenging yourself with heavier weights and more advanced training techniques while listening to your body and prioritizing recovery.
For more expert fitness advice, workout programs, and nutrition tips tailored specifically for men, visit mensbuddy.com and take your training to the next level. Your journey to building an impressive back starts with taking that first step today.